When I tried to insert my first parts using the ePlan Parts Manager, I was quite puzzled by the multitude of available options and fields to fill. I needed quite some time before I figured out a good approach to it. To help you overcome the “first encounter” frustrations I decided to compile this list of basic guidelines for beginners.
As stated above, ePlan allows you to insert for each part a multitude of information which can be extended even further by defining custom fields. To be effective it is important to keep in mind the focus of the project so we can spare time we would otherwise spend inserting information we do not really need.
To access the parts management interface we go to:
Utilities > Parts > Management
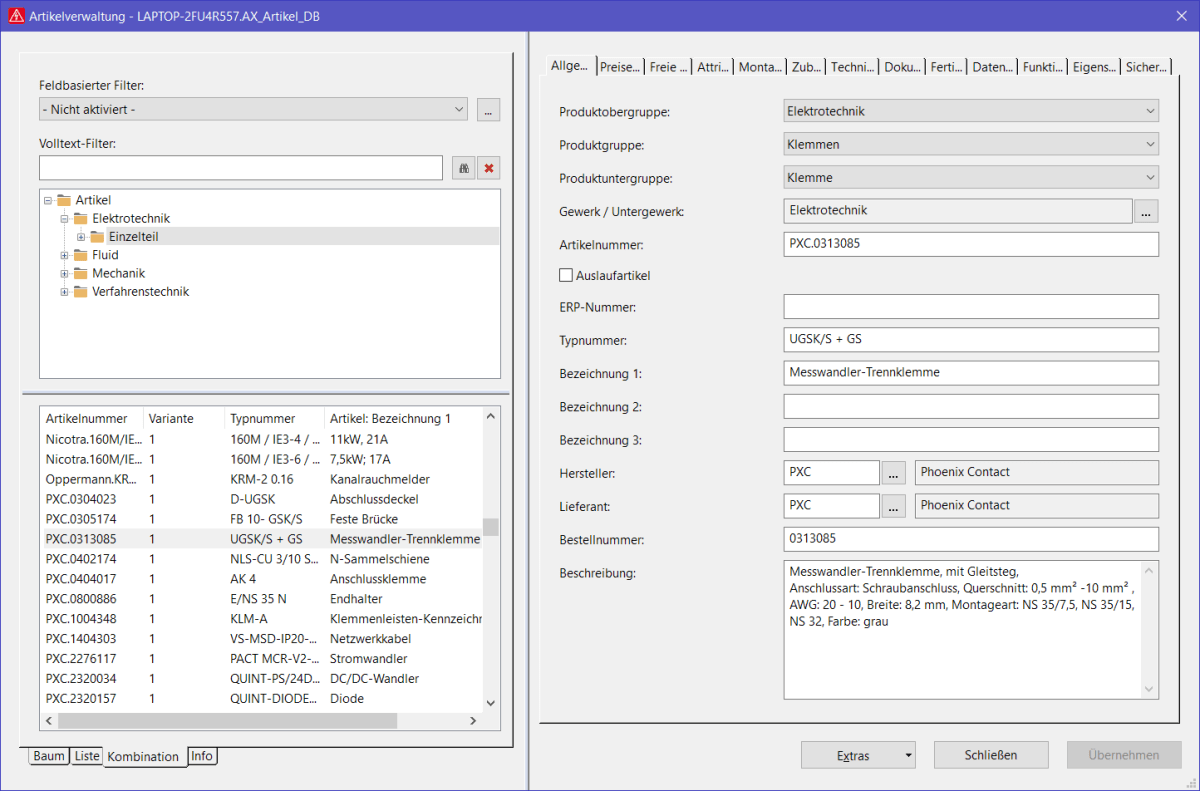
Tab General:
- Group/Subgroup
- Trade
- Product number (Mandatory, it is the ID of the part. My suggestion is to compose it as “Manufacturer short name”.”Order Number”)
- Order number (Mandatory)
- Manufacturer/Supplier
- Type number (useful in lists and search)
- Designation 1 / Designation 2 / Designation 3 (useful in lists, macros and reports, fill as needed)
Tab Mounting data
- Width, Height and Depth are needed for 2D and 3D placement (ePlan Pro Panel), so it is important to fill them correctly. this information is not important for field devices, eg. devices which are not going to be installed in the electrical panel.
- If the device is not to be fitted in the panel, but rather in the field, you may also like to make a check in front of “External placement”. It might come useful when filtering devices in the parts list or reports.
- Image file (very useful when searching, as the picture will be shown in ePlan’s preview window)
Tab Technical data
Technical characteristics (this field is important as the information is automatically transferred to the corresponding field of the function to which we assign the article/part in question and is shown beside the symbol in the wiring diagram.
Here you insert the technical characteristics, you want to be displayed on the wiring diagram under the designation of the device.
Tab Properties
The properties in the properties tab of the ePlan parts manager have predefined default units from ePlan. If the value is inserted in the default unit, than you do not need to write the unit beside the value. Please refer to ePlan documentation to see which default unit is assigned to each field.
It is good to fill the properties in the properties tab for two reasons. The first reason is that it allows me to have a quick overview over the properties of the device, like the feeding voltage or max current consumption next time I might want to use it. The second reason is I might want to export and use this information in my reports. For example, the dissipated power information can be used for the calculation of the total power loss and heat dissipation of the panel.
General advice on ePlan parts Management
My advice in general is not to fill fields you do not know or fully understand. There are again two reasons for that.
- The first reason is, you will spend time filling fields you will probably never need and if you will, you could find out you inserted the data in a somehow wrong or not really useful way.
- The second reason is that sometimes it can create you trouble in the future if the data is not inserted with a clear vision on how it will be used in the future. This can often happen with information stored in the Function Templates tab.
A good approach to the matter is also importing a similar part from the ePlan Data Portal and then change the necessary data to fit the description of the part you wish to insert.
Conclusions
By my experience, this is the minimal set of data to be inserted to get a useful entry in the ePlan parts manager. The selection above is done according to my experience and can vary according to the needs of the specific situation. In general is good to have a clear vision on how the different information will be used in the future development of the design and to avoid spending time on inserting unnecessary information.
If you are interested in more general info on the functioning of the ePlan parts management, click here: ePlan parts database
and here: Database centric architecture in CAD.
Some of the licenses and/or subscriptions that were used to create this content, are sponsored by:![]()
Suggestions and questions are welcome in the comment section below:

Thanks for a greaat read
LikeLike